On-location photography is a labour of love. Successful photo shoots on location require extensive pre-shoot planning. When filming in the same place multiple times, you’ll eventually figure out how to best overcome the unique obstacles you’re sure to find.
You have finally settled on a spot, and you can’t wait to start using it. You must now make provisions for any and all possible outcomes. Oh, well, let’s try to get as many as we can.
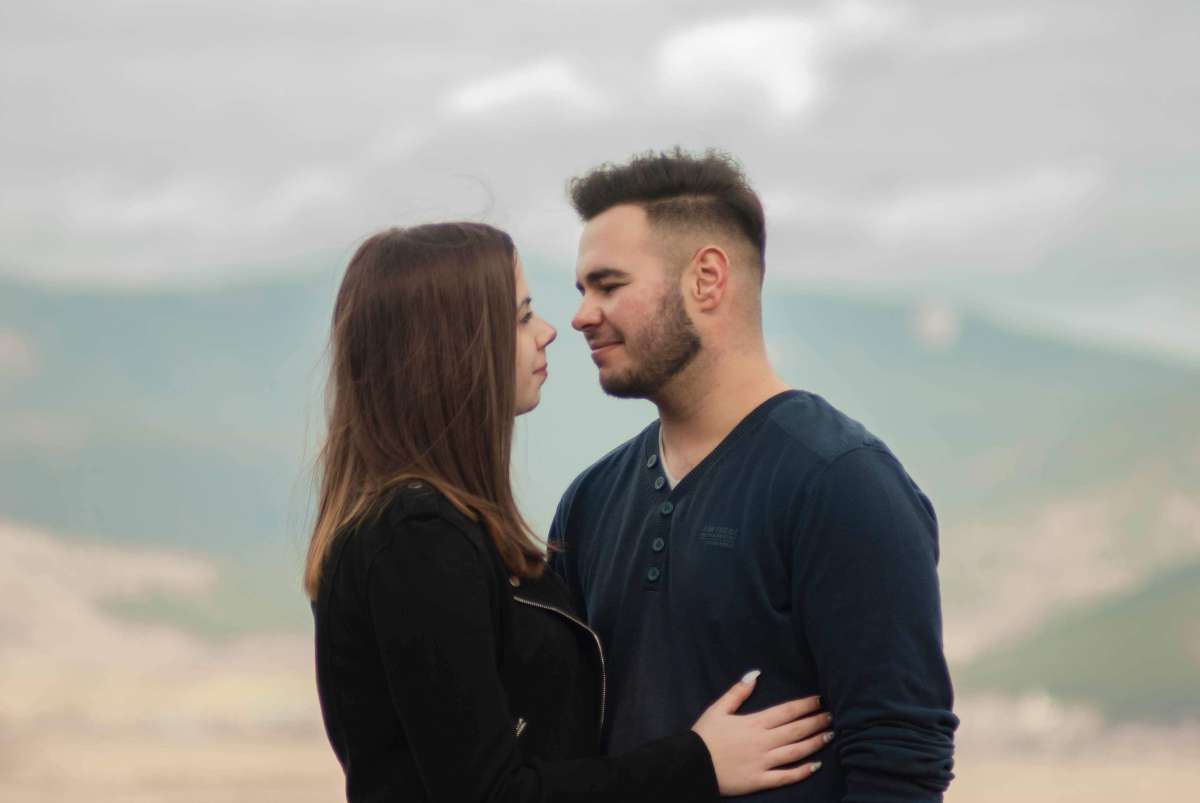
At Cosmopolitan Events, we have compiled a list of the Best Photographers in Melbourne to help you choose who captures your magical day.
Some helpful advice from the pros is provided below as you get ready for your shoot. And show you how to use daylight as your primary light source to create striking natural photographs.
FAQs About Photoshoot
What Is the Best Time to Do a Photoshoot Outside?
he best time to take pictures outside is 1-2 hours after sunrise or 1-2 hours before sunset, which is known as “golden hour.” You can still create beautiful photos at other times though.
What Makes a Good Portrait Picture?
In conclusion, there are 5 core elements that make up a good portrait: Location, lighting, composition, emotion and technical settings. When all 5 of these elements are well executed, a great portrait is created. If any of these elements comes up short, the quality of the portrait suffers.
What Are the Best Camera Settings for Outdoor Portraits?
The key to a great outdoor portrait is considering how bright it is outside. In full daylight, use a lower ISO setting, between 100 and 400, while later in the day or at night you’ll have to pick a much higher setting. Playing around with the ISO settings can produce fantastic results – just don’t go overboard.
Is Morning Light Good for Photos?
The last hour before sunset and the first hour after sunrise are coveted by professional photographers. Referred to as “the golden hour” or “magic hour,” these times provide the perfect light to capture stunning photos. Learning to harness the power of the golden hour is a tool every photographer can use.
What Is the Best Color to Wear for Outdoor Pictures?
As a general rule, any “natural” color that fits in with the earth is usually a safe bet for photoshoots. Sage green, various shades of brown and muted shades of yellow and orange are all earthy tones that photograph well.
Gearing Up and Packing Up
If you’re going to be doing a photo shoot in a real-world setting, you should pack the night before like you would for a vacation. Get everything out in one place to double-check that you have everything you might need.
Charging And Formatting
Then, you should check that all electronics’ batteries are fully charged and that all memory cards have been formatted.
Check Camera Settings
Make sure the next day’s shooting conditions are preset on your camera(s) by adjusting the white balance, ISO, shutter speed, aperture, focus mode, and autofocus area to their approximate values. It’s not good to go into a shoot all worked up. Being more collected, assured, and in charge of yourself would be beneficial.
Cleaning And Packing
After that, you need to check that your filters and lenses are spotless and prepared for usage.
Transportation of Set Pieces
There is more to getting ready for a picture shoot than just packing your camera gear.
If you’re planning on using a lot of styling props and accessories, you should put in just as much effort into making sure they’re in good condition and are packed securely for safe transport.
It’s important to plan how you’ll move, carry, and unpack your belongings before you start packing. These considerations may seem basic, yet they are often overlooked while your mind is racing with a thousand other thoughts.
The things you need least should be packed first. Place props inside of other props if doing so will help you save room.
Think about the space constraints of your vehicle(s). The use of modest props, such as a mat for the ground so the kids may sit on it, is necessary even for the most basic family photo shoot with very small children.
Possible Scenarios
There are so many variables on a set, especially when working with kids and animals.
It’s impossible to plan for every possible outcome, yet unforeseen events often add to the charm of a production. A great example of something that didn’t happen as planned when taking family photos is a kid getting dirty or wet in the middle of a node. But when did kids start spending the day in a pristine state? Consider it a natural occurrence; incorporate it into your photographic recollections as though it were always there.
Marks on garments during a commercial shot do not add to the charm of the production. It might be quite bad if the props or equipment were to break. That’s why I always bring a spare of everything crucial to the shoot just in case something goes wrong.
The List
We have compiled a list of useful props to bring along with you on site for your next picture shoot. Naturally, not everything is required in every situation; it varies by node.
- Tissues, preferably the compact, individually wrapped variety for use on the go
- Hair, dust, and plant matter can all be readily brushed off with a clothes brush.
- Use a lint roller to remove pet hair and lint from garments.
- A hand brush and a plastic bag; I’ve found that there are occasions when you have to pick up cigarette butts or other litter and put it in the bag for later disposal.
- Pins – to secure loose garments
- Clamps – for pinning back or holding up larger pieces like greenery, backdrops, or cloth
- Gaffer’s tape and velcro straps are indispensable since you never know when you’ll need to make a quick repair or alter an existing setup.
- What can you do with some string and some scissors? If a stray frond of vegetation is blocking your path, tie it back instead of cutting it off.
- Keep an assortment of hairbands and hairpins on hand, as it’s often simpler to adjust to the wind’s direction than to try to resist it. change
- Towel, because accidents occur and you may need to remove moisture or dirt
- If you need to go down on the ground to take a photo and the ground, wall, or seat is unclean and will ruin your subject’s or model’s clothing, or if you need to lay down to pack out some of your equipment, a cloth is preferable to the dirty ground.
- Wrap your model in a blanket to keep them toasty while you switch shots in the winter.
- Easy and convenient wardrobe changes anywhere with a pop-up changing tent.
- You’ll need to bring your own shade if you plan on filming in direct sunlight. shelter from the sun with an umbrella or a gazebo
- Kit for making repairs, like those included in hotel amenity kits
- Kit for cleaning cameras, including a lens cloth and dust blower
- Extra power sources and storage media
- Food and drink such as water, bars, and fruit
How to Take Better Pictures in the Great Outdoors
Never Select All Of The Focus Points For Portraits; Pick One.
Selecting autofocus, which lets the camera choose focus locations, is a horrible idea for portraits.
This camera function is typically programmed to concentrate on whatever is immediately in front of the lens. Sometimes the camera may pick a group of focus areas and then average their distances to determine its “best guess.” The photographer has full control while using a single focus point.
Always Focus On The Eyes.
According to the adage, “the eyes are the windows to the soul,” hence they should be the focal focus of every great image. The eyes are the focal point of any decent portrait, and as such, they should be left as sharp as possible. Focusing on the eyes while shooting with a wide aperture will help the lens’ bokeh blur the background, making the skin look smoother.
Shoot Wide Open For Shallow Depth Of Field
One of the most common justifications for purchasing a fast lens with a wide aperture is to get a shallow depth of field. You should take advantage of shooting at f/2.8 or f/4 if you can. Natural light portraits look their best when shot with a wide aperture, thanks to the gorgeous blurring of the background (known as “bokeh”).
Never Shoot A Portrait At Less Than 50mm; Try To Stay At 70mm Or Higher.
The question “Why does my head appear swollen?” is the last thing you want to hear from a customer.
Distortion is possible at focal lengths below 70mm. However, it is not until you drop below 50mm that you will notice it in any significant way. Additionally, a telephoto lens’s compression effect will amplify the bokeh’s blur. I often shoot portraits at a focal length of between 120mm and 200mm.
Always Shoot In Raw.
I’ve shouted this a thousand times, and I’ll probably say it a million more times. Raw is a collection of the unedited data that your sensor captured during the exposure. It serves as your electronic negative. When capturing an image in JPEG format, all unnecessary data is removed, leaving only the skeleton of the original image for the image processor to work with. To put it simply, the more you alter a JPG, the more information you lose. Before exporting to JPG, RAW allows for extensive editing.
Why does this enhance your portrait in this way? Consider the last time you accidentally shot with the wrong white balance and spent hours trying to fix the colour cast, only to end up with a ruined image. With RAW, you might have avoided this problem altogether simply adjusting the colours before opening the image in Photoshop.
Shoot In The Shade (Avoid Direct Sunlight)
Light from the sun is difficult to work with since it causes squinting, casts harsh shadows in the wrong directions, and throws off your white balance. When photographing in the shade, harsh shadows are replaced by the soft, milky shadows cast by your subject’s features. You can get great results by adjusting the exposure and the white balance.
I Am Shooting Carefully On An Overcast Day.
A large cloud cover acts as nature’s “soft box.” You can get better colour saturation and more appealing shadows with a thick layer of clouds.
If You Must Use Hot, Hard, Bright Light
Always aim to direct the light where you want it to go, use reflectors, and create an atmosphere similar to a studio. Unless you’re going for a silhouette, it’s not a good idea to have the sun behind your subject.
If the sun is behind me, I can get great photos by having the subject look away from the camera. Waiting for a cloud to pass in front of the sun is another useful technique; this usually results in a highly brilliant yet contrasted appearance.
Use An Existing Reflector.
Take delivery trucks; we estimate that somewhere over 75% of all such vehicles are white. Large, white delivery trucks, if not painted an off-white, make great fill light reflectors. (The yellow cast will alter the neutrality of your shadows.) Foam core scraps of medium to large size can be found in abundance at local craft stores and picture framing shops. They are usually willing to part with these bits and pieces, and if they aren’t, you can always find some at the trash can.
Learn The Sunny Ƒ/16 Rule
Why? That way, even if you don’t have any other measuring devices on hand, you still have a mental reference point for adequate exposure.
On a sunny day, if you set your aperture to f/16, your shutter speed will be equal to the reciprocal of the ISO setting. As an illustration, if your ISO is set to 100 and your aperture setting is f/16, your shutter speed will be 1/100th of a second. If you’re in the shade or it’s cloudy outside, you should use /8. For the most precise exposure, utilise an incident light metre or a grey card.
Bring A Sheet And A Few Spring Clamps From Home.
Do not remove the luxurious 200-thread-count linens from the bed. Do you already have them? Okay, replace them. Have you forgotten about the ratty old sheet you stashed away in the back of the closet to use as a drop cloth the next time you paint? Get it.
You may also just get the cheapest white top sheet you can find with a low thread count.
A queen-sized sheet makes for a one-of-a-kind and inexpensive diffuser, functioning similarly to a seven-foot softbox but blocking out more of the sun’s glare. To make a sidelight, just wrap one end of the sheet around a tree branch or a clothesline and clamp it.
Keep the sheet from blowing and ruining your photo by anchoring the corners with rocks. Clamp the four sides to whatever is above your subject to create an overhead light source.
Keep The Power Lines And Signs Out!
We’ve spoken about how important it is to keep the camera focused on the eyes, but it’s just as important to keep the viewer’s attention on the full picture. To keep the attention of the viewer on the subject of the shot and not on powerlines, signs, lengthy single blades of grass, single pieces of debris, or even trees, position yourself such that you can frame the subject of the photograph well.
Work With The Weather Every Time You Shoot.
If your session will take place outside, the weather is just another element to consider. That doesn’t mean you should only go on days when the sun is shining and the temperature is high. That may leave you with relatively few shootable days, depending on your location. We have shot in all kinds of weather, including extreme heat and cold, heavy rain, and thick clouds. Realize the situation you’ll be entering and make sure you and your subjects are ready for it.
Treat An Outdoor Shoot Like An Event.
One must always plan for the beginning, the middle, and the end of a major event, taking into account every possible scenario. Your outdoor photo shoot should follow the same rules. Plan out the logistics of the first session, including where you’ll all meet, how you’ll get started, whether or not there will be a break for food or water, and whether or not your subjects will need to change clothing. Planning ahead of time and being in close contact with the customer can help immensely during the filming process.
Start Shooting (Almost) Immediately.
One of the easiest ways to start a shoot is to start it, unless you see an awkward family dynamic or are working with a timid child. It’s fine to strike up a conversation with your subjects upon first meeting, but you should start taking candid shots soon after. Shooting first is a wonderful method to capture a wider variety of expressions because many of the looks and expressions you get at the beginning of the shoot won’t appear later.
Bring A Source Of Fill Light.
Despite the fact that you’ll be shooting outside with the most powerful leading light of all (the sun), you still need to make sure you have enough fill light to eliminate the shadows that will be cast by the sun. Be prepared at all times with a simple reflector, a fill flash, or whatever else you think you might need to improve the lighting on your subject.
Remember That It’s All An Experience.
Most importantly, have fun with the shooting! If you’re having fun, it will come out in your work and the subject’s expression.
When shooting on location, you get to have a more thrilling and varied experience. That’s a positive development, so take pleasure in it! Making the session meaningful, humorous, or exciting will ensure that your subjects have a good time. All of that happiness will shine through in your pictures.
When Does Natural Lighting Outside Provide for the Most Flattering Photos?
When shooting a portrait outside, there is a window of opportunity during which the model’s face will be in the softest light possible. The two to three hours around sunrise and sunset are known as the “golden hour.” In order to capture the finest light, you should arrive at your destination between three and three and a half hours before sunset or one and a half hours after sunrise. The sun is relatively low in the sky during these times, so there aren’t any dramatic shadows. You can use it to take beautiful photographs outside in natural light.
Cloudy days provide flattering, diffused light for outdoor photos. You’ll need a little more practise to get the hang of this light. Pictures would have a certain, silvery vibe on a foggy day. Care must be used in this environment, as it is easy for fine details to get lost if the camera is pointed in the incorrect direction or placed directly against the sky.
When Is the Optimal Time to Take Outdoor Portraits?
You might be wondering, “What season is it right now?” So, why is that so intriguing? Using foggy day photography settings could help you get the most out of challenging conditions. In the winter, you may utilise snowflakes; in the fall, colourful foliage; in the summer, balmy days; and in the spring, gorgeous trees in bloom.
There are a plethora of good times to photograph outside with natural light throughout the year. Taking photographs in the outdoors on a foggy day requires adjusting your camera settings accordingly, but the results are worth it.
Processing Portraits with Natural Light
Getting a good shot accounts for 80 percent of the process. Post-production accounts for the remaining 20%. This is your chance to show off your personal flair and creativity, but use caution and avoid going overboard.
Unprofessional Photoshop work can ruin even the nicest photo. You need to replicate the natural light that you used for your outside photographs.
If you find a photographer whose work you enjoy, choosing an image from their portfolio to represent their work is a great strategy. Make an effort to harmonise the image’s aesthetic with that of the source.
A person can improve their skills via repeated practise. Eventually, you’ll find your own niche in natural light portraiture.
Help with copyrights, please. Be sure your copyright isn’t horizontal. It detracts from the overall effect of the picture.
Copyright placement requires:
- If possible, could you position it in the lower right corner?
- If you want to keep the reader’s attention without distracting them, try turning it vertically.
- Never add any sort of frame or embellishment to your images.
Conclusion
It takes a lot of dedication and hard work to take good photos in a real setting. Planning ahead of time is essential for a smooth outdoor picture shoot. Charge all batteries and format all memory cards before using any electronic device. Make sure your lenses and filters are clean and ready to go before you need them. We’ve put up a list of essential items you’ll want to have on hand for your next photo shoot.
When shooting a portrait, a large aperture creates beautiful background blur, making the subject stand out (known as “bokeh”). To get the most out of the available light when photographing portraits, use a fast lens and shoot at f/2.8 or f/4. In photography, “raw” refers to the unprocessed sensor data from an image. Using RAW, you can make a lot of changes to your photo before you export it to JPG. By tweaking the exposure and the white balance, you can achieve fantastic results.
Create studio lighting by using reflectors and clouds. If you’re shooting outside on a sunny day with an aperture of f/16, your shutter speed will be proportional to the inverse of your ISO value. Shade or overcast conditions call for /8. In order to get the perfect exposure, you should use a grey card or incident light metre. Lay lay the groundwork for the first meeting by deciding where to convene and how to get things rolling.
If you think you might need to improve the lighting on your subject, carry a simple reflector, a fill flash, or both with you at all times. Outdoor photographs taken on a foggy day benefit from the diffused light they create. Photos taken in the fog would have a cool silvery look to them. You can use snowflakes in the winter, autumn leaves in the fall, and hot heat in the summer. You’ll need to tweak your camera’s settings for optimal results when shooting outdoors in the fog, but it’ll be worth it. You have the opportunity to showcase your unique style and flair, but do so with caution and restrain yourself from excessive Photoshopping.
Content Summary
- Successful photo shoots on location require extensive pre-shoot planning.
- Some helpful advice from the pros is provided below as you get ready for your shoot.
- If you’re going to be doing a photo shoot in a real-world setting, you should pack the night before like you would for a vacation.
- There are so many variables on a set, especially when working with kids and animals.
- It might be quite bad if the props or equipment were to break.
- We have compiled a list of useful props to bring along with you on site for your next picture shoot.
- Wrap your model in a blanket to keep them toasty while you switch shots in the winter.
- Focusing on the eyes while shooting with a wide aperture will help the lens’ bokeh blur the background, making the skin look smoother.
- One of the most common justifications for purchasing a fast lens with a wide aperture is to get a shallow depth of field.
- When photographing in the shade, harsh shadows are replaced by the soft, milky shadows cast by your subject’s features.
- You can get great results by adjusting the exposure and the white balance.
- Unless you’re going for a silhouette, it’s not a good idea to have the sun behind your subject.
- As an illustration, if your ISO is set to 100 and your aperture setting is f/16, your shutter speed will be 1/100th of a second.
- Clamp the four sides to whatever is above your subject to create an overhead light source.
- To keep the attention of the viewer on the subject of the shot and not on powerlines, signs, lengthy single blades of grass, single pieces of debris, or even trees, position yourself such that you can frame the subject of the photograph well.
- Plan out the logistics of the first session, including where you’ll all meet, how you’ll get started, whether or not there will be a break for food or water, and whether or not your subjects will need to change clothing.
- Most importantly, have fun with the shooting!
- The two to three hours around sunrise and sunset are known as the “golden hour.”
- You can use it to take beautiful photographs outside in natural light.
- Cloudy days provide flattering, diffused light for outdoor photos.
- Pictures would have a certain, silvery vibe on a foggy day.
- Using foggy day photography settings could help you get the most out of challenging conditions.
- There are a plethora of good times to photograph outside with natural light throughout the year.
- Getting a good shot accounts for 80 percent of the process.
- You need to replicate the natural light that you used for your outside photographs.
- If you find a photographer whose work you enjoy, choosing an image from their portfolio to represent their work is a great strategy.
- Make an effort to harmonise the image’s aesthetic with that of the source.
- Eventually, you’ll find your own niche in natural light portraiture.
- Be sure your copyright isn’t horizontal.
- Never add any sort of frame or embellishment to your images.